Webflow’s memberships are still running in BETA, which is why I wouldn’t recommend you to use it on a production-ready Webflow website just yet, but they’re very close to releasing the first version of Webflow Memberships.
To get started with using Memberships for your Webflow website, simply open your designer for the website which you want to enable, click on the Users tab, accept terms and conditions, and press enables on this site. You’re now ready to use the BETA of Webflow Memberships.
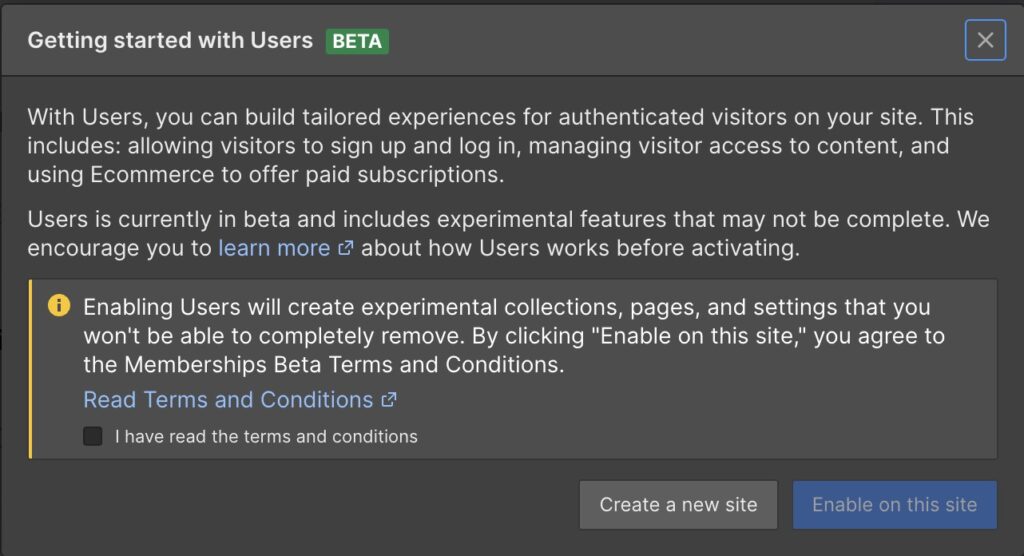
With Webflow Memberships, you can now create gated content as videos or guides you only show to certain members. You can create multiple user groups based on the tier your users are on and much more.
Use Cases For Webflow Memberships
There are endless options for using Webflow Memberships for your Webflow website. The most obvious is if you’re running a paid course and you’re using Webflow. Then you can now lock the different sections behind payment walls or sign-up walls.
And then use teasers to try and convert visitors into users and then users into paying customers, but this is only one option.
Another option is if you’re creating videos with important content you only want specific people to see, then this is also a golden opportunity to have all the great functionality Webflow delivers and combine it with locking it behind a sign-up wall.
Maybe you have an onboarding for your internal colleagues everyone needs to go through; you can also use Webflow for this.
Or if you’re an agency or a freelancer and you want your clients or potential collaborators to watch some material before you make a deal.
As mentioned, there are so many possibilities. It’s just to grab the one which fits your needs and then combine it with the excellent editor Webflow provides, and then you’re ready to make a beautiful membership experience.
Webflow Memberships Setup Guide
Before you can get started with using your membership features, there are a couple of steps you need to follow, including setting up your store if you want to take payment for your gated content.
If you just want to have free users without any premium tier, then you can skip a lot of the steps. And don’t get overwhelmed with the many steps, it doesn’t take much time to get started, and you can always circle back and optimise later on.
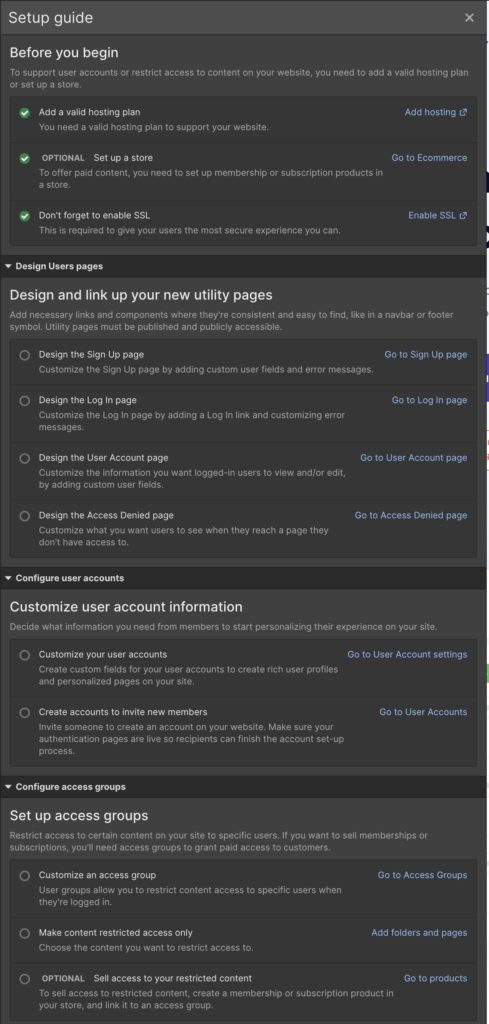
Before You Begin
This is the easiest of the 4 major steps, and often this is solved without you lifting a finger. A valid hosting plan right now is any hosting plan, even the free one. This might change when the memberships feature is no longer in BETA, but right now, you’re good to go, no matter your hosting plan.
If you plan to take payment for your content, then you’ll have to set up a store. Simply press “Go to Ecommerce” and follow the steps to set up your Webflow store. It’s very straightforward, where you have to add basic information about your business, currency, shipping and taxes.
Next up, you have to design your store pages, your cart, product pages, checkout and e-commerce emails. Lastly, you need to add a payment provider and enable your checkout. You can only use Stripe or PayPal at the moment.

Design And Link Your Utility Pages
With the basics out of the way, it’s now time to show your creative side because now we need to design the experience for your members and users.
Now you need to design your login page, sign-up page, user account page and access denied page.
If you already have a theme where these pages are included, then you can re-use those elements from those pages. If you don’t want to do it now, you can simply also just skip it, as Webflow does pre-design the pages for you, so you can quickly get started.
I will, however, encourage you to make some changes to the access denied page as it’s very dull right now, and the incitement to sign up to see the content is very low looking at the page.
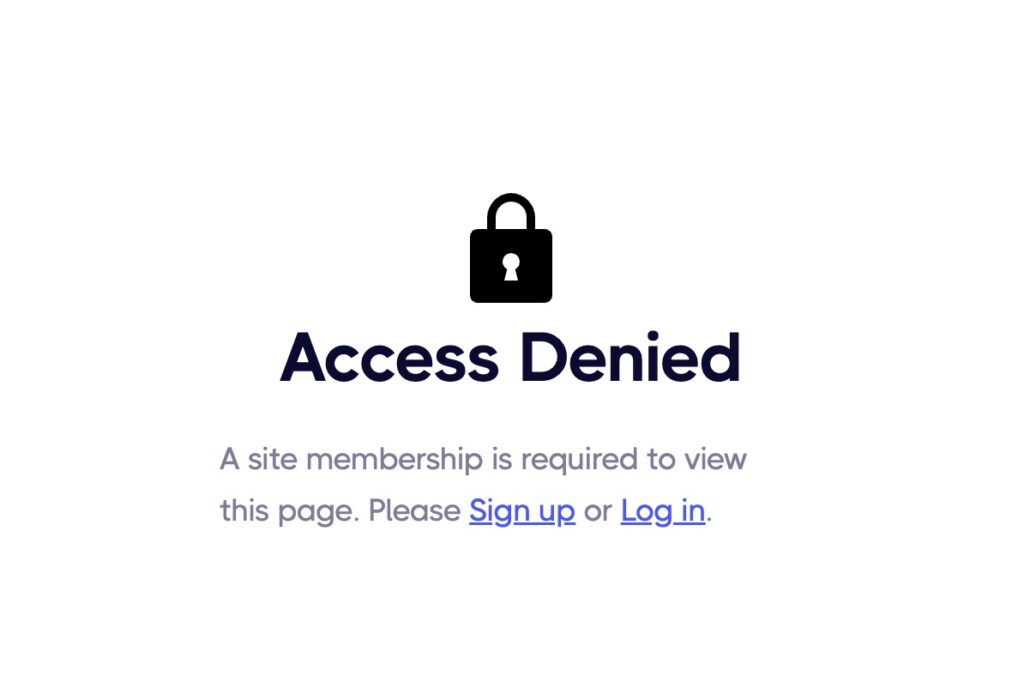
Tip: I would add a more exciting image and some text about what they can expect to read/watch behind the payment-wall when they sign up for your fantastic content. Give this page some life, maybe a teaser or a video, to really entice the potential user to sign up.
Customise User Account Information
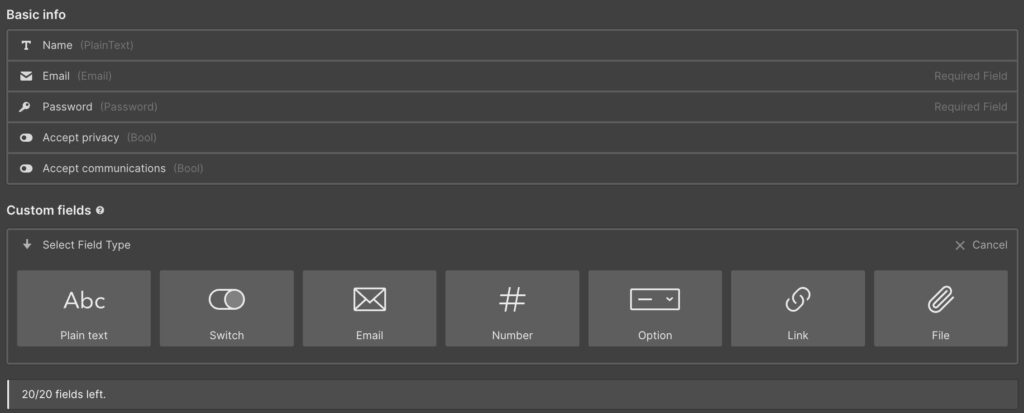
This step is skippable as well, depending on your needs. Here you can add custom fields for your Webflow membership users.
Per default, you have fields like name, email, password, privacy policy and newsletter permission. But you can add up to 20 custom fields. Maybe you want to ask for their phone number, address, or something else that you need from them.
The last step is that you have to invite at least one person so that person can go through the sign-up phase to make sure everything looks like it should and works as it should. If you want, you can just invite yourself and go through the steps. It’ll be well worth your time.
Set Up Access Groups
Now for the last, and for some, the most critical steps. It’s now time for you to build your membership groups. Usually, the more they pay, the more content they get access to, but maybe you run a different model.
Set up your different access groups. If you only have free content, then set up one access group. Name it Free, set the group type to free access and grant access after a user signs up and verifies their account.
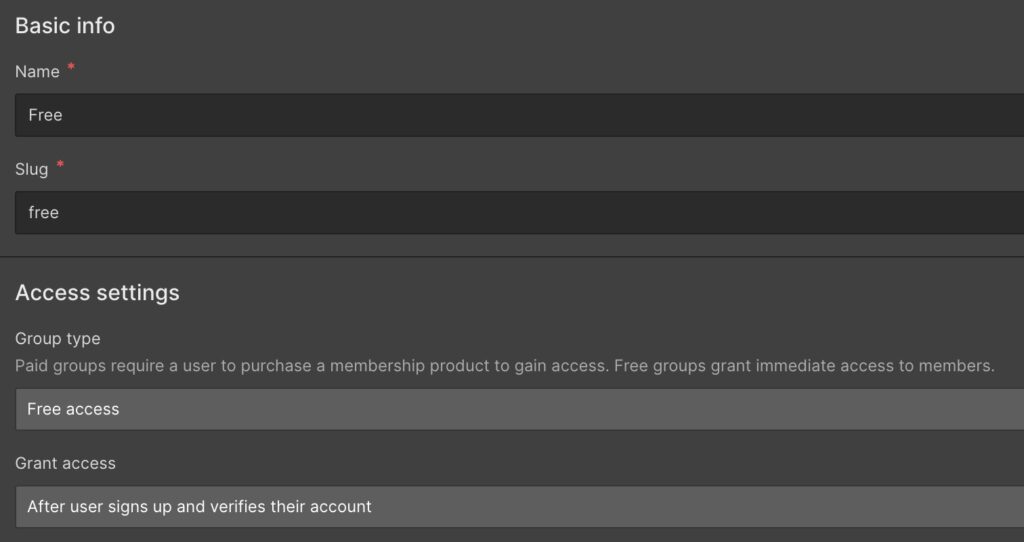
Now, completely automatically, anyone who signs up will be added to the free plan you just created.
Now the last thing to do is to gate your content. Simply lock the content for users who are not on your free plan, so everyone who sees it will have to sign up if they want to read and watch your content.
This is super simple to do, and there are 2 ways. Either you can lock a page or an entire folder. To do so, open your pages in the menu and click on the settings icon next to the page or folder which you wish to lock behind a sign-up wall.
In the access control section, choose specific members only, and then in the dropdown, choose the free plan which we just created. Remember to publish your changes.
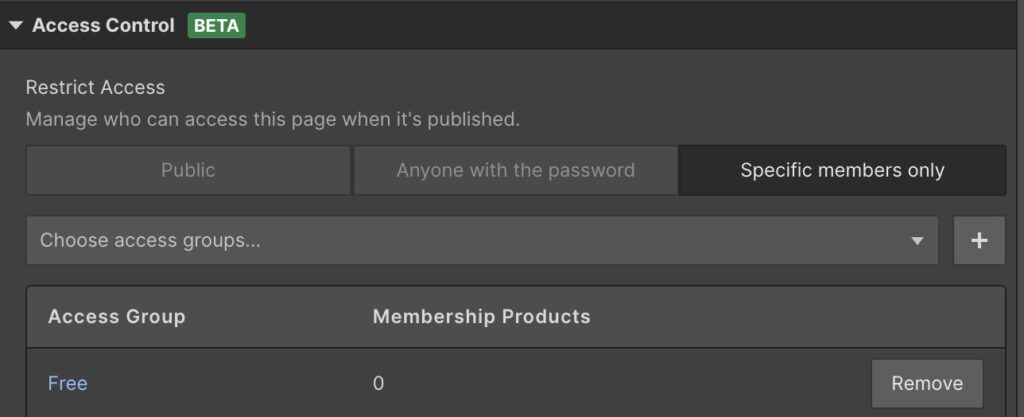
And that’s it! You’ve now set up your membership website in Webflow and locked your first page or folder behind a sign-up wall.


![How To Export Your Webflow Website [Free + Paid] How To Export Your Webflow Website [Free + Paid]](https://webonlabs.com/wp-content/uploads/2023/03/How-To-Export-Your-Webflow-Website-Free-Paid-380x220.png)

