A/B testing is an extraordinary way of trying everything from a new button type to an entire layout change.
If you’re in a situation where you want to make changes to your website, but you’re curious whether it will increase or decrease your conversion rate, then A/B testing is what you’re looking for.
You can use any tool to set up A/B testing, and I’m using VWO in this guide as Webflow integrates seamlessly with it.
What Is A/B Testing
A/B testing is a powerful tool for improving a website’s or marketing campaign’s performance. It’s a method of conducting experiments to compare two versions of a product or design to determine which one performs better.
This type of testing can help answer questions like “Will changing the colour of this button increase conversions?” or “Which headline will result in more clicks?”
To run an A/B test, you must create two versions of your design or content – the control version and the variation. The control version is typically the original, while the variation includes changes you want to test.
For example, if you’re testing a landing page, you might create two versions with different headlines or calls to action.
Once you’ve created your variations, it’s time to start the experiment. You’ll need to use a tool like VWO to randomly send users to either the control version or the variation.
As users interact with your website, these tools will track their behaviour and provide data on how each version performed.
Multivariate testing is another type of experiment that simultaneously tests multiple variations of a design or product to determine which combination performs best.
This approach can be helpful when you have several changes you want to test simultaneously.
When running tests, it’s essential to ensure they are statistically significant – meaning that enough data is collected to determine which version performed better confidently.
Otherwise, small fluctuations in user behaviour could skew results.
Redirect tests are also useful for comparing different versions of a website. These tests involve sending users clicking a specific link or button to different pages based on their randomly assigned version.
How To Set Up A/B Testing For Your Webflow Website
With this method, it’s entirely free to A/B test on your Webflow website, and you can do it on the free plan on Webflow.
Start by creating an account with VWO, which is super easy.
1. Create an Account with VWO if You Don’t Have One Already
If you don’t already have a VWO account, the first step is to sign up for one. Visit the VWO website and follow their registration process. Once you have an account, you can start setting up your A/B tests.

2. Set Up a Campaign/Website at VWO
After creating your VWO account, log in and set up a new campaign or website. This is where you’ll manage your A/B tests and track the performance of different variations.
Follow VWO’s on-screen instructions to create your project and configure the settings to match your website’s goals.
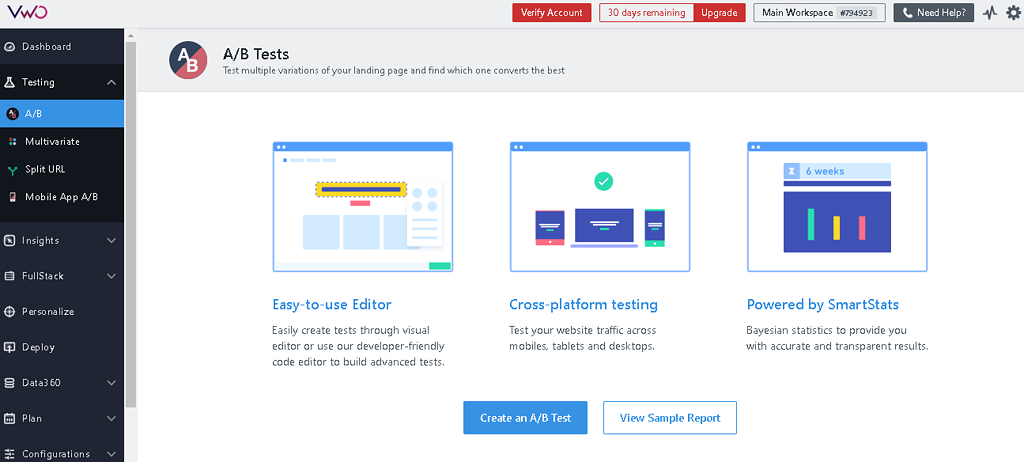
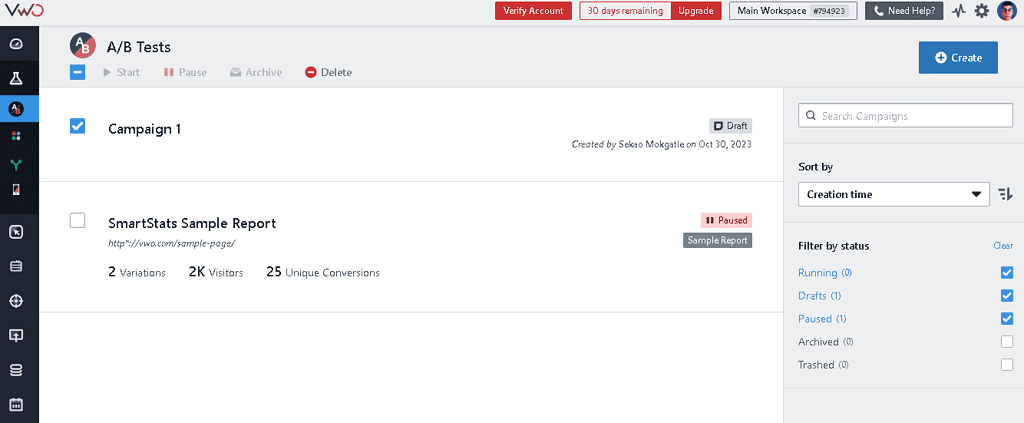
Click A/B in the menu, then click Create in the top right.
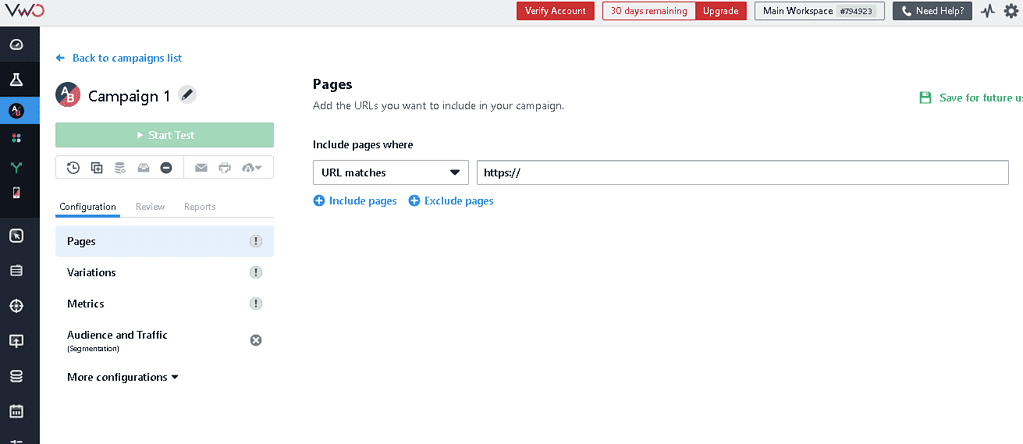
Set the name of the Campaign.
3. Get the Tracking Script from VWO
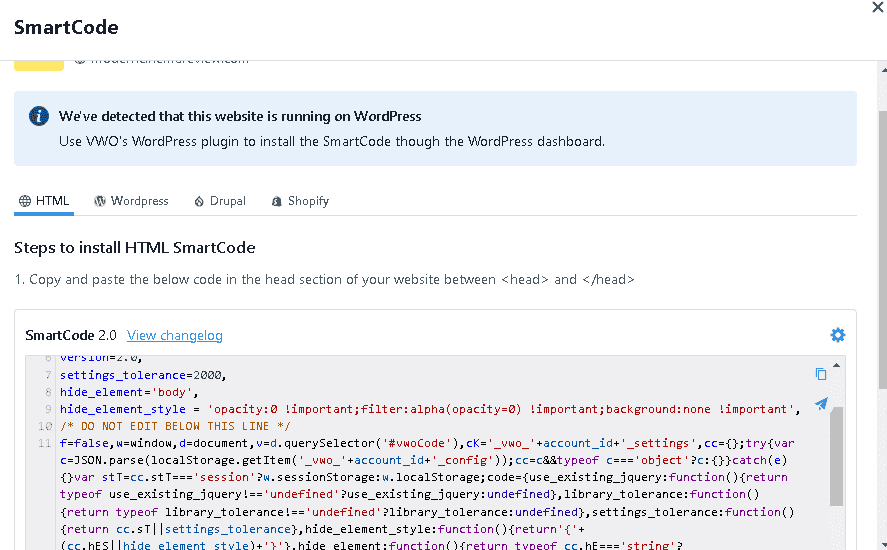
VWO requires a tracking script to monitor user interactions and collect data for your A/B tests. Once you’ve set up your campaign, VWO will provide you with a unique tracking script.
Copy this script to your clipboard, as you will need it shortly.
4. Sign in to Your Webflow Account
Now, sign in to your Webflow account and select the website you want to A/B test.
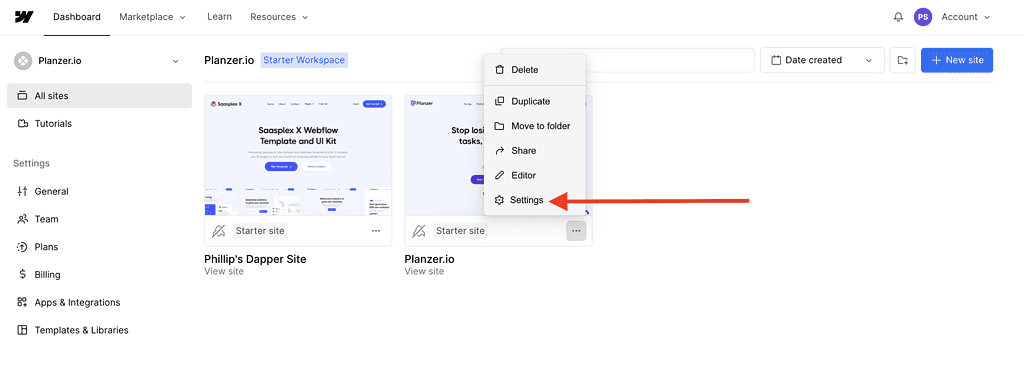
5. Click on settings for the project you want to A/B test.
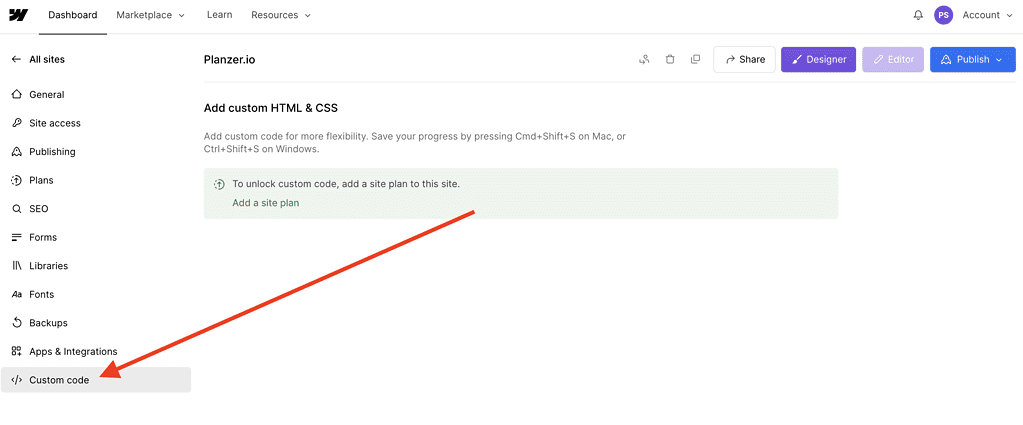
In Webflow, you’ll need to access the area where you can add custom code to your website.
This is typically found under the “settings” tab or an equivalent section within your Webflow website settings. Look for options related to adding custom scripts or code snippets.
6. Insert the Script and Save the Changes
In the settings section, paste the VWO tracking script you obtained in step 3. Ensure that the script is correctly placed in the header or body of your website.
These changes will integrate VWO with your Webflow website, enabling you to track user interactions and conduct A/B tests.
7. Go Back to VWO and Make the Changes You Want to the A/B Test
Return to your VWO account and navigate to the campaign or website you set up in step 2.
You can start creating and configuring your A/B test variations, which might involve changing elements such as headlines, images, call-to-action buttons, or other elements on your Webflow site.
Once you’ve made the desired changes within VWO, follow VWO’s instructions to launch your A/B test. VWO will automatically direct the different variations to your Webflow site, and you can monitor the results within VWO’s analytics and reporting tools.
Remember to keep your A/B tests running for a sufficient duration to collect statistically significant data. Analyze the results and use the insights to make informed decisions for optimizing your Webflow website’s performance and user experience.
By following these steps, you can effectively set up A/B testing on your Webflow website using VWO, helping you make data-driven improvements to your site.
When To Use A/B Testing
A/B Testing is perfect if you want to carefully test a new styling, button or page but are afraid of how it’ll affect your current conversion rate.
Remember, A/B testing doesn’t have to be a 50/50 split of your visitors, and you can also do 75/25 to ensure you don’t lose too much traffic or revenue.
In conclusion, A/B testing is an essential tool for optimizing the performance of your Webflow website. You can increase conversions and achieve your business goals by identifying which design or content elements work best for your audience.
However, it’s important to remember that A/B testing should be used strategically and with a clear purpose in mind.
Before starting any A/B test, take the time to define your conversion goals and test goals. This will help you focus on your goals and ensure meaningful tests. Test only one element at a time and run tests long enough to gather statistically significant data.
It’s also important to remember that A/B testing is not a one-time event but an ongoing process. Continuously monitoring and optimizing your site through A/B testing can lead to long-term success.
When deciding whether to use A/B testing for your Webflow site, consider factors such as traffic volume, conversion rates, and the potential impact of changes on user experience. If you have a high-traffic site with significant revenue at stake, investing in regular A/B testing can pay off dividends.
Ultimately, successful A/B testing requires careful planning, strategic thinking, and ongoing experimentation. With these elements in place, you can unlock the full potential of your Webflow site and achieve tremendous success online.
Benefits of A/B Testing for Webflow Sites
Here are 4 benefits of doing A/B testing. Remember, A/B testing is time-consuming, but the outcome is extraordinary. You get so much value and data from doing A/B testing.
Improve Your Webflow Website with A/B Testing
As a Website owner, you must improve the user experience and achieve your business goals. However, figuring out what works best can be challenging.
That’s where A/B testing comes in. By testing different web page versions, Webflow site owners can identify which version performs better and optimize their site accordingly.
Boost Conversions with A/B Testing
A/B testing allows you to test various elements on your website, such as headlines, images, calls-to-action (CTAs), or layouts.
By comparing two-page versions and measuring their performance through metrics like click-through rates (CTR) or bounce rates, website owners can determine which version is more effective in converting visitors into customers.
For example, let’s say you have an e-commerce site that sells shoes on Webflow. You want to increase sales by improving your product pages’ conversion rate.
You could create two versions of your product page: one with a single CTA button, “Buy Now”, and another with two CTA buttons “, Buy Now” and “Add to Cart.”
After running an A/B test for a few weeks, the version with two CTA buttons has a 25% higher conversion rate than the original page.
Make Data-Driven Decisions
One significant advantage of A/B testing is that it provides data-driven insights into how users interact with your Webflow website. Instead of guessing what might work based on intuition or assumptions, A/B testing allows you to make informed decisions about design changes based on user behaviour.
For instance, if you’re unsure whether changing the colour of your CTA button from blue to green will improve conversions, run an A/B test to see which version performs better. If the green button leads to more clicks than the blue one, you know that changing the colour was a good decision.
Identify and Fix Issues
You can also use A/B testing to identify and fix issues causing high bounce rates or low engagement on your Webflow website. By testing different versions of a webpage, you can pinpoint the elements that are turning visitors away and make changes accordingly.
For example, let’s say you have a landing page with a high bounce rate.
You could create two versions of the page: one with a long-form copy and another with a short-form copy. After running an A/B test, you find that the version with short-form copy has a 20% lower bounce rate than the original page.
This insight tells you that visitors prefer shorter content so that you can adjust your other pages accordingly.


