Redirects are one of the best tools for working with websites and, in this case, also Webflow websites. If you rename the URL or discontinue a page for the benefit of a new one, you need a redirect not to lose traffic.
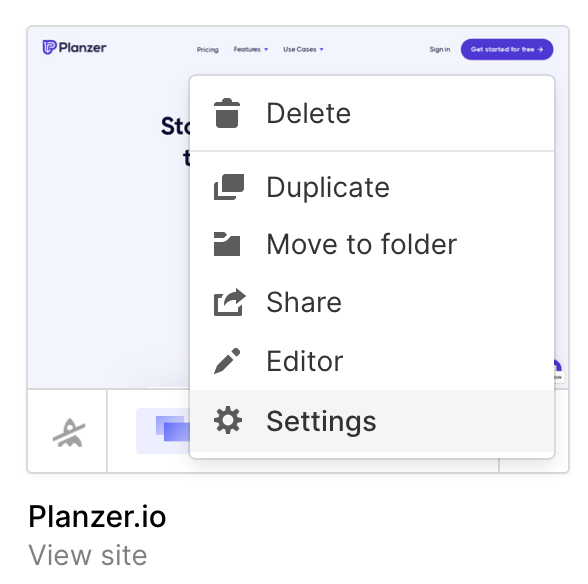
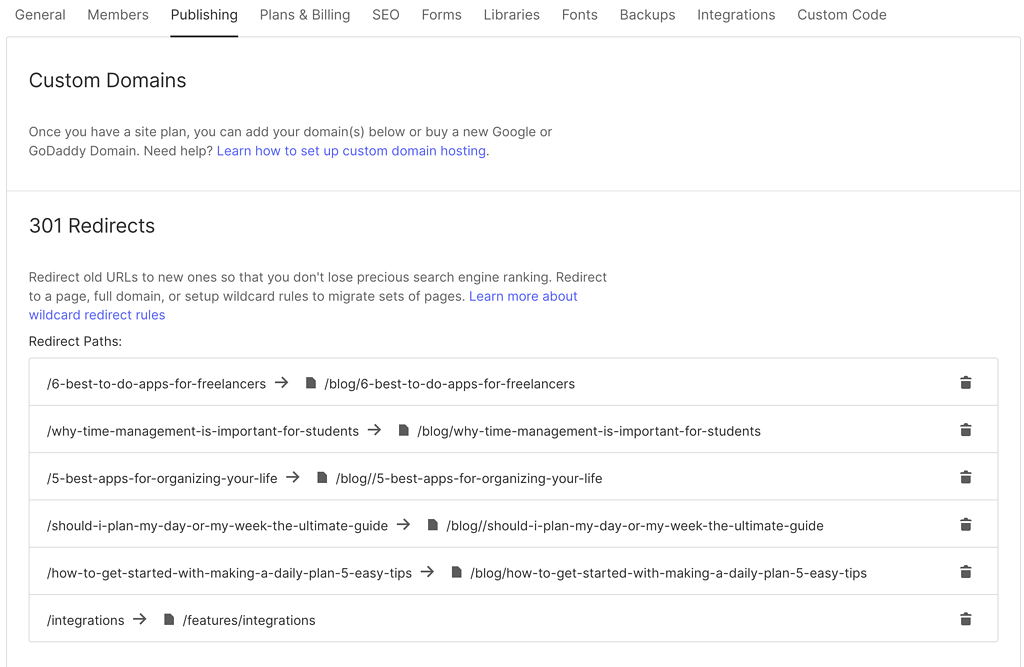
To set up redirects in Webflow, you can either let it happen automatically or you can do it manually. Go to the project you wish to set up redirects for, and click on settings -> Publish. Scroll down to 301 redirects; here, you can add all the redirects you wish for.
Now that you know how to set up redirects, let’s dive into the benefits of using redirects and what the different types are.
What Are The Different Types Of Redirects?
There are numerous different types of redirects, but they’re categorised into 3 main categories, and only 2 of the categories are relevant to you.
Permanent redirects: This is the type of redirect you use when a page has been permanently moved to a new URL or replaced by a new page on a new URL. For this, you’ll use a 301 redirect.
Temporary redirects: You will rarely use this, but when you want to redirect a URL to a new URL temporarily, this is the type of redirect to use. For this, you’ll most likely use a 302 redirect. This can also be if your specific page just is temporarily unavailable.
It’s so important to use redirects, as you’ll improve the user experience on your website. No one wants to see a 404 page because there is no redirect to the right page. Setting up a monitor to monitor the 404 pages on your Webflow website is a good idea.
To monitor your 404 pages, you can use Ahrefs entirely free, and they have the most powerful Site audit.
Using redirects will also help your SEO profile, as user experience is a big element for Google when measuring the performance of your website.
How To Set Up Redirects In Webflow
You should only create a redirect when you have something relevant to redirect to. If you’ve removed a blog post or a page and you don’t have anything relevant to link to. Then it’s better to let people see a 404 page and then redirect to the front page.
This is also better for your SEO, as you tell Google the page no longer exists.
You should, however, always set up a redirect if you’re changing the URL or you’ve made a new page where it makes sense to redirect.
Pro tip: Test your redirects because sometimes a mistake or typo can happen. Open up an incognito window, and then visit the URL that should redirect to the other URL.
Set Up Redirects In Webflow Automatically
When you change the URL of an existing page or CMS item, Webflow will tell you that it might break external URLs, and you have to set up a redirect. In some cases, you’ll get a checkbox where you can set it up.

In other cases, you’ll have to set it up manually, but clicking on the link and adding the redirect with the old and new URLs. I’ll explain this in the next section.
Set Up Redirects In Webflow Manually
To set up a manual redirect there are 2 ways to get to the module where you add the redirects. Either you can go to the page or CMS item where you want to change the URL, and then change the URL. Here you’ll get a message with a link to set up a redirect.
Another way is to click on the three dots and then settings for the project you wish to set up a redirect for.

And then, in the top menu, click on Publishing. If you look a little down on the page, you’ll see the title 301 Redirects, and this is where you’ll add all your redirects.

Right now, Webflow only supports 301 redirects, so this is your only option at the moment.
Simply add a redirect, where you enter your old URL and the new URL after wards, and then you press add redirect path. That’s it, and then you’ve set up your first 301 redirect.

You can also use wildcard redirects if you want to redirect everything after a URL to another URL or another wildcard URL.
Maybe you’ve moved your blog to now be resources.
Then you’ll have to set up a redirect that redirects /blog/(.*) to /resources/%1. This will save you a lot of time, and you don’t have to set up a redirect for every single blog post.
FAQ
Should I use 301 or 302 redirect?
Use a 301 redirect when you have permanently changed the URL and want to transfer all the SEO juice to the new URL.
Use a 302 request when you have only changed the URL temporarily to a new URL.


![How To Export Your Webflow Website [Free + Paid] How To Export Your Webflow Website [Free + Paid]](https://webonlabs.com/wp-content/uploads/2023/03/How-To-Export-Your-Webflow-Website-Free-Paid-380x220.png)

